Image Overlay Editor: Text, Logos, and Shapes on Your Ads
Design overlay presets for images: text with custom fonts, logo placement, shapes with borders and edge blur, plus every keyboard shortcut.
The image overlay editor is a focused design tool for ad branding: put text, logos, and shapes on top of your creatives, save the arrangement as a preset, and apply it across every export. Open it from the Overlay Library (Create Preset → Image Preset) or directly from the preview step via Add Overlay.
The editor at a glance

- Add Layer — four layer types: Text, Image, Rectangle, and Ellipse.
- Reference — load one of your images behind the canvas to design in context (preview-only, never exported).
- Layers panel (right) — select, toggle visibility, reorder, duplicate, and delete layers.
- Autosave — with a preset name set, changes save automatically; the header shows Saving… / Saved. Save As… forks a copy.
Text layers
Text layers cover everything from headlines to legal lines. The properties panel gives you:

- Font — your uploaded brand fonts first, then system fonts. Size from 8 to 200 px.
- Style & alignment — bold, italic, underline, strikethrough; left/center/right.
- Color and opacity — any hex color, 0–100% opacity, plus an optional text shadow (color, blur up to 50, X/Y offset ±50).
- Text Box — independent fill, border (1–20 px), and box shadow toggles with padding and corner radius: this is how you build CTA buttons and badges without a separate shape layer.
Image layers (logos)
Image layers pull from your overlay image library — logos, badges, product shots. You can replace the image, crop it in place (Enter commits, Esc cancels), lock the aspect ratio while resizing, and set opacity for watermark-style placements.
Shape layers
Rectangles and ellipses work as color bars, button backgrounds, and scrims behind text:
- Fill — color + 0–100% fill opacity.
- Border — optional, color, 1–20 px width, own opacity.
- Corner radius — rectangles only, up to half the shorter side.
- Edge blur — 0–50 px feathering, ideal for soft gradients and scrims that keep text readable over busy footage.
Working the canvas
Drag layers to move them — smart guides snap to edges, centers, and other layers (toggle with the Snap button). Shift-click or drag a marquee to multi-select; right-click for the context menu.
| Shortcut | Action |
|---|---|
| ← → ↑ ↓ | Nudge selected layer(s) 1 px — hold Shift for 10 px |
| Delete / Backspace | Delete selected layer(s) |
| Cmd/Ctrl + Z | Undo (Shift+Cmd/Ctrl+Z to redo) |
| Cmd/Ctrl + G | Group selected layers (Shift+Cmd/Ctrl+G to ungroup) |
| Cmd/Ctrl + 0 / 1 | Zoom to fit / 100% zoom |
| Mouse wheel | Zoom at cursor |
| Alt/⌥ + drag (or middle mouse) | Pan the canvas |
Applying presets to your exports
Overlays are applied in the preview step, per file and per format. The Overlays panel offers Add Overlay (opens this editor in a modal) and Quick apply from library — presets whose dimensions or aspect ratio match the current format:
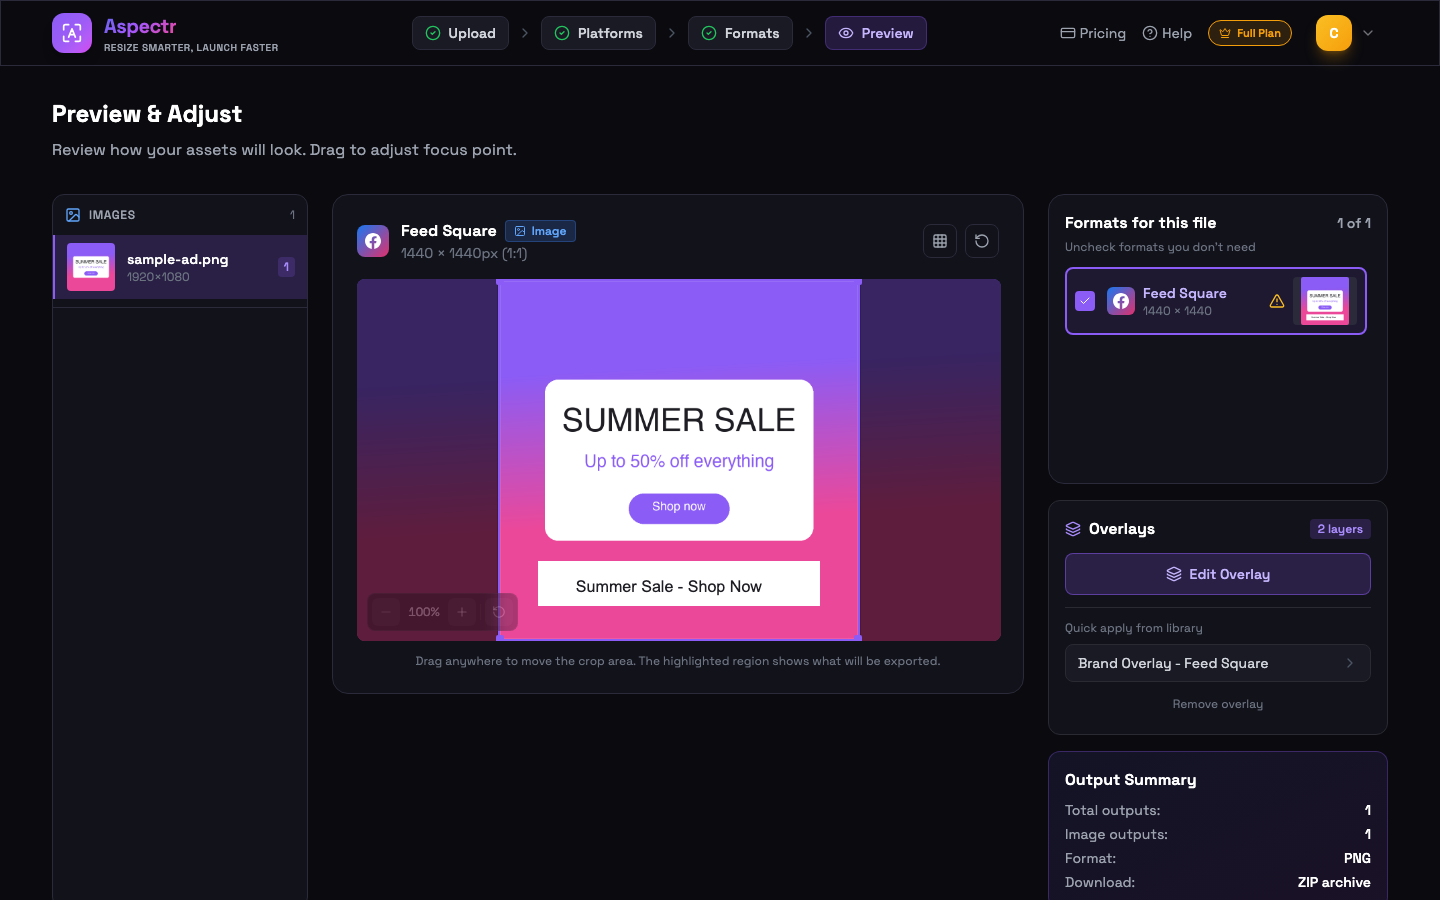
- Presets are matched by exact dimensions or same aspect ratio (within 1%), so the quick-apply list only shows designs that fit.
- Applying a preset designed at different dimensions auto-scales every layer proportionally.
- Each format can carry a different overlay — or none. Edit Overlay tweaks the applied design, Remove overlay clears it.
- Overlays are composited into the final files at full export resolution — what you see in preview is what lands in the ZIP.
Common questions
No. When you apply a preset to a format with different dimensions, layers auto-scale proportionally. For formats with very different aspect ratios, use Duplicate in the library to create a repositioned copy you can fine-tune.
Yes — upload TTF/OTF/WOFF/WOFF2 fonts in the Overlay Library. They appear as "Your Fonts" at the top of the font picker, above the system fonts (Arial, Helvetica, Times New Roman, Georgia, Verdana, Courier New).
Yes. Once the preset has a name, changes autosave a few seconds after you stop editing — the header shows Saving/Saved. Save As creates an independent copy.
It loads one of your images behind the canvas so you can design the overlay in context. The reference is preview-only — it is not saved with the preset and never appears in exports.
In the preview step, each file+format combination has an Overlays panel. Apply a preset there (or design one on the spot) and it is composited into the exported image at full resolution.